Saturday, December 13, 2008

Step 7 - Plumbing and Electrical


I had done some of the electrical prior to prepping for drywall for practicality's sake (I needed light to work in the kitchen), but I'll recount how I went about it here since it makes more sense for chronology's sake.

The last thing to do before buttoning up the walls is electrical and plumbing--experience in which I possessed none. Fortunately, I was able to easily tap the copper water lines and sewer stack that were running up to the upstairs bathroom, which were conveniently located behind the wall I had just demolished, approximately 18" from where I planned on installing the sink.

Not knowing anything about soldering pipe, and basing it only on my experience with soldering electronics, I wasted an entire spool of solder that came with the torch. I bought another spool and researched the correct method on the Internet. I had the torch heat far too low, and I didn't realize that the idea is to heat the pipe to the temperature that will melt the solder, not vice versa. After that, it was cake.

Tapping the sewer stack was a little more tricky. Ordinarily, PVC (the white plastic pipes) joints are as simple as 1) coating with purple acetone cleaner 2) coating with epoxy 3)inserting pipes into joints and 4) turning 1/4 turn. I had no problem with that until it came to make the last connection. Because I was connecting the top of the stack, (which was fixed) to the bottom of the stack (which was also fixed) I could not turn the joint 1/4 turn. After screwing up twice (looked fine, but leaked), I decided to go with a rubber boot (absent from the above picture) to make the final connection. It's simply a rubber boot that you slip over each end of the joint, with hose clamps that are tightened down. Worked like a charm, and it was cheap too.

Next was electrical. I was planning on installing recessed lights in the kitchen. Recessed lights (cans) come in two varieties - new construction, and remodel. The remodel cans are simply inserted into a hole in a finished ceiling, then you turn screws on the can which extend little arms that hold it in place. New construction cans have adjustable length hanger bars that are simply nailed into the joists. I purchased the remodel cans first, but realized quickly that 1) stud finders to not work on plaster ceilings and 2) the arms on remodel cans are not designed to accommodate the thickness of a plaster ceiling and will not work with a plaster ceiling.

Since I was covering up the plaster ceiling entirely anyway, I decided I would jury-rig the new construction cans to work. To accommodate for the thickness of the ceiling, I first attached 2x4s to the joists, and then attached the cans to the 2x4s, which hung lower than the joists, thus lowering the cans, and accommodating for the thick ceiling.


As you can see from the above picture, cutting the hole for the recessed light in the upper right corner removed all of the support that corner of the ceiling had. It collapsed entirely. I decided to deal with that later.

I also installed pendant lights. For some reason, the remodel electrical boxes seemed to work ok here. You can see here where I hit a stud by mistake and had to install my electrical box a couple inches to the right.


I also wired a GFI outlet for the kitchen backsplash and attached 3 more outlets to that. In most localities, all that is required to meet code for outlets in wet locations is that the first outlet in the series be a GFI. That outlet, so long as its functioning properly, will automatically cut power to any outlets after it on the same line, if there is a ground fault in any of those proceeding outlets.


Thursday, December 11, 2008

Step 6 - Preparing for Drywall

A rowhouse poses a unique problem when it comes to drywall: all of the exterior walls are solid brick, and thus, you cannot simply drill screws into it to affix drywall. There are a couple of routes one can take to get around this problem. A friend suggested that I use Liquid Nails construction adhesive as well as small roofing nails to hold the drywall while the adhesive cured.

I did as my friend suggested, in spite of my misgivings--it just doesn't seem like any amount of glue could hold a whole sheet of drywall. But in fact, it did. However, plaster walls are very uneven, and this posed problems at the seams, where one sheet would stick out farther than another. I had my friend who suggested the whole thing come over and help me fix it. We put a lot more nails into it near the seams, as well as some more glue. While it did work, I didn't feel comfortable using it on the other exterior wall, so I hung furring strips, which is the other option.

Furring strips are 1x3 pieces of wood that are screwed into the brick using masonry anchors, (I used Tapcon screws), which then provide a surface that can be drilled into, just like an ordinary wood stud.


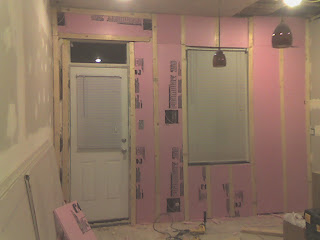
As you can see here, I also opted for the R6 foam insulation. Not much protection, but every little bit helps.

Next, I framed out the cabinet wall using 2x4s and 3" decking screws.


Incidentally, here, you can also see where I patched a hole in the chimney, where I knocked out a brick while removing the plaster. I used some cement patch from Home Depot, and some wire mesh that I found under the plaster as a substrate for the cement. I followed the directions on the cement bag exactly, and the cement was like soup for about 15 minutes, and then it started firming up. Within about 8 minutes of my noticing the cement curing, it was too solid to work with. Fortunately by then, I had already patched the hole.


Here, you can see where I framed out an alcove for the refrigerator, to accommodate its depth.

Step 5 - More Demolition


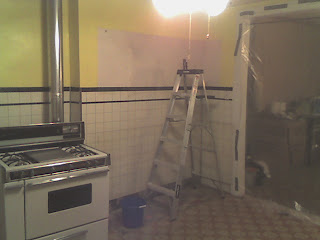
As I mentioned earlier, the kitchen wall in this picture has a 9" bump in it, which would look strange once cabinets were hung here. The plan was to frame out the wall to the left of the bump so that it was all the same depth. The refrigerator was to go in the corner where the ladder is in this picture, but the refrigerator is too deep, and would stick out into the walkway. I decided to use my reciprocating saw to cut an alcove in the wall to accommodate the depth of the refrigerator.

It was then that I learned that the violent reciprocating action of the saw on a plaster and lath wall cracks all the plaster within a several foot radius of the cut. As a result, I ended up demoing the whole wall, since most of the plaster was destroyed by a small test cut anyway.


As you can see, the bump was due to the chimney. The builders also took advantage of the cavity created by the wall to conveniently run the sewer stack and hot and cold water lines to the second floor.

A messy, dusty job. I filled seven construction bags with plaster in the cleanup process. Plaster weighs a lot, you can only fill about 1/5 of a construction bag before it weighs over 60 lbs, and is no longer practical to carry. Plaster also has a propensity to go airborne. This demolition coated my living room in a fine layer of dust, in spite of the plastic drop cloth.

Friday, August 15, 2008

Step 4 - The Floor Has to Go

Because the floor had a horrendous dip in it, we had three options: 1) jack the floor up from the basement until it was level, and scrape off the vinyl flooring lay tile 2) use self-leveling cement to fill the dip, then scrape the surrounding vinyl or, 3) rip everything out and start from scratch.

Option 1 seemed to be the most appealing. I began to scrape and discovered another layer of flooring, glued to the subfloor:

This gave me pause, since ripping up even this little patch had taken hours. The floor was shaky. The more I read about tile, the more I discovered that the substrate (surface upon which the tile is installed) had to be especially sturdy. I really wanted to install travertine, a natural stone, which is even more fragile than ceramic tile and required even a sturdier subfloor. Also, it occurred to me that some sort of structural defect was causing the dip, and it must be dealt with. I cringed as a realized the only option was option 3, ripping everything out and starting from scratch.
I decided to use a circular saw to cut the floor into slabs, and then pry the slabs off the joists. I first drilled pilot holes from the basement so that I wouldn't hit a floor joist with the saw. I then cut the slabs and attempted to pry them off the joists. However, the nails were huge, and the planks were not coming up easily, if at all.

To work around this, used a floor jack in the basement and a 4x4 post to jack the planks up off the joists. It was hard work. Three days, and a lot of blood and sweat later:

Note, you can actually see the dip in this picture on the fourth joist from the bottom of the picture.

After that, I wanted to make sure that these joists were not going to flex at all under the weight of the travertine I planned to install. I bought 12' long 2x6s to attach to and strengthen the existing joitss (called sistering, or buddy studding). I used 3/8" diameter bolts on either side of the joist, as well as 6 3 1/2" length decking screws, and liquid nails adhesive to attach the 'sisters' to the existing joists.

This also had the advantage of creating a perfectly level and flat surface for my new subfloor.

Incidentally, I found out that the dip was caused by a joist which had cracked, and the crack hidden with paint. As it turned out, the joist was cracked almost all the way through, and it was the subfloor that held the joist up, instead of vice versa.

I then installed 3/4" CDX plywood on top of the joists:

Step 3 - Replacing the Back Door

The moulding around the back door was curiously stubborn and would not come off. After some investigation, I determined it was because it was being used as a door latch! Good thing no one ever tried to kick that back door in! So, before we could proceed any further, it became evident that we were going to have to replace the back door. One little hitch:

This behemoth 240v air conditioner was installed in the door jamb, and suspended by steel cables attached to the exterior of the house. Further investigation would reveal that in the formstoning of the back of the house, it in effect cemented in the air conditioner. I used a hammer to smash away the cement holding it in but was still not sure how my waife girlfriend and I would manage to get this thing down without killing ourselves. Fortunately my friend Carl stopped by, and gave us a third hand to lift this thing down from overhead. I put the air conditioner on Craigslist, and it too was gone that same day. Now I had a gaping hole in the back of my house.
Installing the new door was tricky too. Normally you just put screws through the jamb into the frame of the house. However, the frame here is brick. I purchased special concrete screws from Home Depot, which require that a pilot hole be drilled first. Some said the trick was to drill into the mortar since it's softer, but my house was so old, it just crumbled, so I was going to have to drill directly into the brick. I bought a special masonry bit from Home Depot and attempted to drill the holes for the door frame. It was extremely slow going, and I went through several bits. It took about 5 hours to get 5 screws in. I found out in a later project that I should have rented or purchased a hammer drill, which is a drill especially created for drilling into masonry or concrete, and uses a percussive action to crush the brick as it drills. (I later bought a hammer drill and added three more screws, each hole took about 5 minutes... Lesson learned)

Twelve hours after I began this endeavor, the door was in, though I still had a gap above the door where a custom transom window would later go.

Step 2 - Demolition

We began scraping away the "tile" which lifted off easier in some places than others. Much to our surprise the paint was applied to some sort of coating on the plaster. We're still not sure what the coating was, but it also came off with a spackle blade, so we scraped that off too. Eventually, however, we realized that the brown adhesive was not coming off, and it did not respond well to sanding (not that we'd want to be breathing that dust in anyway). Though not sure what to do at that moment, we eventually decided to drywall over the wall.


The cabinets came out a lot easier than one might think. Just a few screws. Found someone on Craigslist to take them that very day. A lot easier than hauling them off to the dump, and nice to know that someone else will get some use out of them.

Step 1 - Appraisal and Planning

This is what I started with. Linoleum floor with a nasty dip. Generic cabinets. Highlighter yellow paint abutting faux-tile--a plastic laminate printed to look like tile, and then glued directly to the plaster with construction adhesive. A decades old range, no dishwasher. A drop ceiling. And that horrible plastic ceiling fan, the only source of light for the kitchen.

My girlfriend Claire took measurements and devised three plans for the kitchen. Ultimately, we decided to keep the positioning of the cabinets the same, and add a large center island with breakfast bar.

One problem was that the cabinet wall was not flat. Though not immediately evident from the above photograph, the cabinet wall juts inward 9" at the range. We planned to frame out a new wall, such that it would be completely flush and preserve the aesthetic appeal of a flat wall of cabinets.

As for the floor, the plan was for ceramic tile or natural stone on the floor, which posed a dilemma because there was about a 1" dip in the floor just in front of the range, and tile requires a completely flat surface. We thought we'd simply "jack it up" and we'd be good to go, but as it turned out, it was far from being that simple.

Thus our plan was:
-Remove the drop ceiling
-Remove old cabinets, frame out and new wall and cover with drywall.
-Jack up floor, cover with tile.
-Remove fake tile paper and repaint walls.
-Purchase refrigerator and dishwasher, replace range.

If only it were that easy...