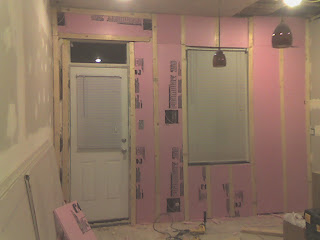
 I did as my friend suggested, in spite of my misgivings--it just doesn't seem like any amount of glue could hold a whole sheet of drywall. But in fact, it did. However, plaster walls are very uneven, and this posed problems at the seams, where one sheet would stick out farther than another. I had my friend who suggested the whole thing come over and help me fix it. We put a lot more nails into it near the seams, as well as some more glue. While it did work, I didn't feel comfortable using it on the other exterior wall, so I hung furring strips, which is the other option.
Furring strips are 1x3 pieces of wood that are screwed into the brick using masonry anchors, (I used Tapcon screws), which then provide a surface that can be drilled into, just like an ordinary wood stud.

As you can see here, I also opted for the R6 foam insulation. Not much protection, but every little bit helps.
Next, I framed out the cabinet wall using 2x4s and 3" decking screws.

Incidentally, here, you can also see where I patched a hole in the chimney, where I knocked out a brick while removing the plaster. I used some cement patch from Home Depot, and some wire mesh that I found under the plaster as a substrate for the cement. I followed the directions on the cement bag exactly, and the cement was like soup for about 15 minutes, and then it started firming up. Within about 8 minutes of my noticing the cement curing, it was too solid to work with. Fortunately by then, I had already patched the hole.

Here, you can see where I framed out an alcove for the refrigerator, to accommodate its depth.
2 comments:
Hey Mike - glad to see you adding all of the construction steps to the blog. Have you added your site to houseblogs.net or blogtimore.com? These will help get a bit more traffic, and a lot of folks can learn from what you've done.
Thanks for the tip. I've actually got a pretty big backlog of posts to author, but I'm in the middle of renovating the living room/dining room area, which is consuming all of my free time. I'd kind of like to hold off 'going live' until I've got a few more entries.
That said, I can definitely do better than I have been the past few months haha
Post a Comment